Wednesday, July 24, 2013

Guns: M77 Paladin & M3 Predator

So we wanted to make some guns to carry with our costumes.  We decided to just go with pistols, since it was literally the weekend before Comic-con and they sounded fastest to make.  I also wanted a pistol because it seemed easier to carry something small around rather then something big and bulky.  And also my Shepard, who was a biotic, totally used pistols.  The pistol I used most in game was the M77 Paladin, so I made that.  And my husband Trevor made the M3 Predator cuz he just kinda liked the way it looked, and it is the standard default gun to go with his standard default armor.

We browsed a lot of other blogs on Mass Effect guns.  Some people make them out of wood, and then do a mold and pour plastic.  And while I think that looks GREAT, we did not have that kind of time.  We decided to make ours just out of the same EVA Foam we used for the armor.  Now I have also seen people make them out of foam but reinforce them with something rigid inside, but....eh, we decided to skip that and JUST do foam.  Since pistols are smaller, this did not seem to be a big deal.

For both guns we went online, brought up a picture of the gun and used our projector to project an image onto the foam (much like we did with many of the armor pieces).  We traced a general outline of the gun and cut it out.  We did them several layers thick.  For the M3 Predator the main body of the gun is 3 pieces thick, but the parts with details have an extra layer on each side of a total of 5 layers.


We used a combo of the dremmel tool and soldering iron to add the various detail lines.
For the M3 Predator we added black craft foam to the handle.  We painted the 2 barrels of the gun black.  Then we added 2 pieces of black PVC pipe to the front to act as the front barrel details.  The red parts I just painted on with acrylic paint.  And for the white letters I have a computerized machine that cuts self-adhesive vinyl so I made them out of that.  Now it is a good idea if you are going to use vinyl to add a layer of some sort of clear coat on top, otherwise they do have a tendancy to start peeling off after 4 days of use.  On my armor I just added a layer of Modge Podge over the vinyl, but I did not have time to do that to my gun.  The white letters looked a little TOO white, so I got a dry paint brush and added the smallest amount of black paint and kinda dabbed some on.


For the M77 Paladin we used a very similar process.  We did not need to use any craft foam on this one, we just painted parts of the handle with black acrylic paint.  We sanded the edges with a dremmel tool to get that curved look.  The Paladin is a thinner gun overall, but it felt like it was lacking some definition, but if we added more craft foam then it would for sure look too fat, so to get that definition we just used the dremmel tool to carve in the black part a bit where the handle meets the body.  We used black PVC for the gun barrels, and also there is a piece on the back of the gun.  And everything else is similar, vinyl letters, red acrylic paint details, and lines burned in with a soldering iron.

So all in all the 2 guns took us a day and a half total, which isn't too bad actually.  And here are some pictures of the completed guns!

The M3 Predator:


The M77 Paladin:


Finished Armor!!!!!!

HOORAY!!!!!!!  We finished our Armor and just in time for Comic-Con!  Here are pictures!


Wednesday, July 17, 2013

Random Additional Details

So here are all of the random details that we added to our armor that I did not mention before.

For the N7 Logo on the breastplate we used vinyl.  I have a "Cricut" which is a machine that cuts paper, vinyl, ect... it's something that scrapbookers use.  So I used this to cut out some N7 logos, the vinyl is self-adhesive so it is very easy to use.  Which by the way, if anyone needs custom decals for their costumes I am happy to cut anything out, just shoot me an email with what you need, paypal me a couple of bucks to cover materials and I can pop 'em in the mail.


We made little "vents" to go on the bottom of the box that contains the light's housing on the back.  We did this by layering 3 big squares of craft foam, with little strips of craft foam at the edges to keep them separated.
I also sewed some black belt pouches, that way we could carry our cell phones, money, ect...  I just got some black canvas, measured our phones to make sure they would fit, and sewed them so that the canvas would be 2 layers thick (cuz nothing looks sillier than floppy belt pouches)

We also made belts out of the strapping 1.) to hold belt pouches and 2.) cuz otherwise the stomach armor kinds bows out a bit and looks silly so this holds it down.


Sunday, July 14, 2013

Day ???+1: Female Thigh Re-do

Hey remember the other day when I thought I was basically done with my armor but I said the N7 female thighs were a little funny, but oh well they worked ok.  Well......I finally had a chance to put on my entire suit of armor, and OMG the thighs looked stupid once we had them all strapped into the various places that they needed to be strapped.  They puckered, they didn't wrap around as far as I wanted, ect....  I didn't manage to take a pic of the front but here is a pic of the back and you can see the butt is not in the right place.  And trust me the front is worse.
Also, remember way back on my very first blog post when I said I wasn't sure about if I wanted N7 Legs or Hanhe-Kedar legs?  Well screw it!  Even though this is the LAST weekend before comic-con, and even though we don't have any weapons yet and we were going to do that all weekend, we figured let's just make Hanhe-Kedar Thighs (the shins are pretty much the same).  Hahaha.  So talk about 11th hour change ups!  Well the good news is these are super simpler.

We did not have a pattern, so we just took a picture of my Shepard wearing her thigh armor, then loaded that picture up onto our projector and cut out the approximate shape.
Then we glued them together to make a little 3 sided box, then we started gluing on details.
Thankfully we were able to just take the straps and the detail pieces holding on the straps, and unglue them from the first thighs and re-glue them to these.  So actually these didn't take too long and I am pretty pleased with the result. 
I am also hoping it will be easier to sit down with these new thighs since they are only in the front and do not wrap around to the back.


Wednesday, July 10, 2013

Day ???: Legs

Comic-con starts a week from tonight, oh my gosh we are so tired.  It doesn't help we spent last week camping in the Sequoias...  In the beginning I was writing this blog each few days as we did the actual work on the armor, but things around here got busy and I got a little behind, but don't worry, I took pictures so here is some catch-up blogging!

So we started making the N7 thighs, these have very large areas that need to be cut away so we can inset different colored craft foam to get the details looking good.  Up until now we had been using the sanding bit on the dremmel tool to sand away any areas we needed.  Well, now that we had been playing around with the soldering iron to burn in the detail lines, we decided to switch to the big flat head our iron came with and use it to burn away large areas, and WOW, this works soooo much faster.  Now a word of warning, it doesn't look pretty, which is fine if you are going to cover it in craft foam, but not great if you are going to leave it uncovered.

The thighs have lots of detail pieces that we made out of the thin craft store foam.


The butt has a funny butt cheek shaped detail, which we were also going to make out of craft foam, but it looked really stupid that way. 

So for that piece we just cut out a butt cheek out of the EVA Foam and shaped it in the oven and then glued it back in smooth side out.  It may not be easy to tell from the pictures, but trust me it looks much better this way.
 So we needed something to shape the thigh piece around.  We used a wine bottle for the arms, but needed something bigger for the legs, so we used a growler from a local microbrewery.  Don't read too much into this, I swear we are not alcoholics, hahaha, but glass bottles seemed to be the only thing around our house that wouldn't melt, ect...  Well anyways, it was not tall enough to do the entire thigh piece.  We actually couldn't think of anything better to use, and it was difficult to shape such a large piece.  Luckily there is a stripe halfway down the thigh, so we just cut the thigh in half there, shaped both halves, and glued them back together and covered it up with the decorative stripe.
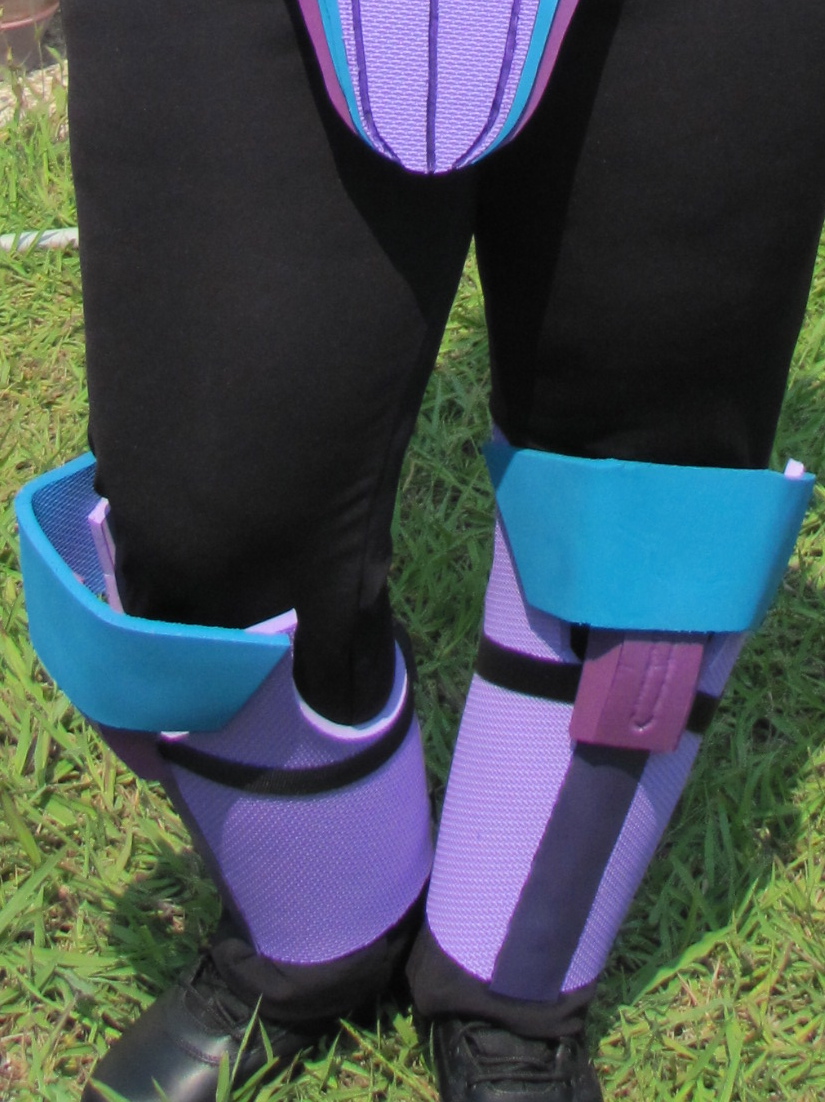
And for the decorative circles, we just did a bottom circle in craft foam and then cut out concentric circles of craft foam and layered them on top.  To attach the thing we have two straps that buckle along the leg and also a belt that sits around the waist.
There are cute little details where the straps attach to the thigh.  We just made those out of two layers of craft foam and then put a slit in it with a craft knife so we could run the strapping through it.

So I will also point out that the thighs fit my husband GREAT!  Me however, not so much.  Mine are too loose at the bottom and too loose at the top, but perfect in the middle.   Well I was thinking about this and it makes perfect sense.  A lot of men don't really have hips, they just have straight legs that go up and down (my husband for sure fits this description).  Where as women tend to be a lot more curvy in the hip area, so ideally for a woman's thigh armor you would mold a compound curve, so that it not only curves around the leg, but also curves  from top to bottom.  Now that sounded COMPLICATED and Comic-con is a week from tonight (OMG!!), so yeah, I am not doing that.  I am just going to make my lowest strap tight, as well as the waist belt, and that will kinda hold it into position.

The shin armor was pretty easy, it's just 3 pieces, with an inset craft foam strip down the middle.  The upper knee (the teal part in the female armor) is made from one piece that we heated and just bent.  The smaller lower knee (medium purple on the female) was too small to just bend, so we just made a little 3 sided box out of 3 separate pieces.  And the actual shin part is just one piece that we cut out and shaped.


And here is a picture of inside the knee and shin.  We just held all the bits together with hot glue and strapping.
For boots, we bought "Response Gear Tactical Footwear" boots from Big 5 Sporting Goods.  They were $29.99, which is the everyday price, and they are actually pretty comfortable.  They come in men's and women's, and it is an item that Big 5 carries all of the time.  For me footwear is NOT something I am willing to compromise on, walking around Comic Con all day is exhausting, and I have done it in cutesy little heeled boots and regretted the heck out of it later.  So $29 for something that is comfortable, yes please.
We were going to glue foam bits to them, but seeing as Con is in a week....eh....maybe we won't.  Also the armor looks pretty good even with the boots plain.  Here are some pictures of the progress so far and you can see what I mean.  I don't seem to have any complete pictures, there is always at least one piece of armor missing, hahaha.  Well, I will take more pics soon.


Wanna see a really funny picture?  Here is my husband attempting to sit down in the armor, hahahaha