Friday, May 31, 2013

Day 13: Straps, Buckles, Clips, ect...

So now that our armor is coming along, we needed to come up with a good way to strap it closed.  We had experimented with hot gluing velcro to the foam, but that was NOT working very well.  The velcro sticks to itself better than to the foam, so you can use it once, but once you try to take the armor off, the velcro comes with it.  So instead we decided to use plastic clips.  Evil FX mentions on his blog that he just went to a thrift store and picked up a bunch a bags and what not and used the straps off of those, because yes plastic clips at craft stores are oddly expensive.  Well I hear the rest of the country is cheaper, but in San Diego, CA thrift stores seem oddly expensive (I blame the hipsters).  But what we do have is a very nice collection of dollar stores.  My favorite is "99 Cents Only."  I went there and they had a whole bunch of useful items with straps and buckles.

I found these utility belts, dog collars, and luggage straps.  And the nice thing is the dog collars come in 4 different sizes so you can have different sized buckles where you need them.

For the side we used the dremmel tool to cut out a notch and then just hot glued the clips right to it.  We made sure that the armor fits, so we didn't need straps, so the size is not adjustable, but that is fine.  This worked really well, and they do not come off when we put on or remove the armor.
We also hot glued some straps to the shoulders and put buckles there.


Day 12: The Neck

We had gotten pretty far on the lower back, now it was time to work on the upper back neck piece.  The neck is 2 layers, the layer closest to the neck is painted dark on one side and the outer layer has a hole in the middle so you get a little bit of a window effect going.  So for the female neck we had been using a heat gun to shape in and it was working, but very slowly.  For the male neck my husband decided to just throw it in the oven on broil for like 45 seconds, and WOW that worked so much better.
You can see how much better the shaping is going on the grey oven pieces over the purple heat gun pieces.
So we did the purple one that way as well, and we didn't even need to get a zip tie, or something to mold it around, we just wore heat proof gloves and held it in place.

So here is what the male armor looks like so far with the neck (which is still in progress, we haven't glued on all the little bits yet).


We also added some more detail pieces to the center of the back, the box that contains the light mechanics has little vents or something on the bottom.  We did this with the cheap craft foam.

Day 11: Painting

The back has a lot of very small detailed pieces.  My husband spent the day cutting bits out and I spent the day spray painting them.

I feel I have come to have an intimate relationship after hours of spray painting, and I have found that not all spray paints are created equal!!!  The Rustoleum Painters Touch Ultra Cover 2x really is better!  For some pieces I had to switch to the Krylon because they had the color purple I liked, the color coverage with the Krylon is not as good, and I need to do multiple coats to get a soild color.  That wouldn't be such a big deal if the Krylon also didn't take twice as long to dry!  So all in all it took much longer to paint with the Krylon than with the Rustoleum.  The Valspar can I have is a little older than the other two, so that may account for some of it's annoyances, but overall it did not paint as evenly and also needed extra coats.  Since it didn't paint as evenly, most of it would be dry except spots where there was extra glops of paint.  So all in all I REALLY liked the Rustoleum, it really does coat twice as well, and I liked that it dried faster.  I bought my Rustoleum at Home Depot, where as the Krylon was from Michaels Arts & Crafts, so maybe that is why there is such a difference since one is just for "hobbies" and the other store is for serious around the house projects???
The very small pieces are difficult to paint because they don't weigh much, and the spray paint literally blows them away if you are not careful.  I found the best thing to do was aim straight down at them, get a good layer of paint going.  The excess paint actually caused them to stick to cardboard I was painting them on.  Once they were stuck, this allowed me to go in from the side and get the edges.  All and all I am very pleased with how the painting is coming along!


Sunday, May 19, 2013

Day 9-10: Male Back Pieces

We had already done the base of the back, but now we needed to add the detailing, the lights, and the bottom half.  For lighting we used Electroluminescent (EL) Lights.  We got them off eBay, if you just do a search for "EL Lights," you will get results in all sorts of colors and lengths.  We used ours for the circle in the center of the back as well as the 2 stripes to each side.  We bought the 9 foot (3 meter) length which was PERFECT, they were about $4-5 each and shipped from China (which means it took them like 3-4 weeks to arrive to USA).  It comes with a small battery pack which takes 2 AA batteries.
We used the dremmel tool to create the two circles.
 We added sides underneath so it would form a little box, which gives the compartment to hide the battery pack.
 We drilled holes in the circles and fed the light thru it.

 We did glue the light down so it doesn't pop up, as you will see in later photos.
We also cut out a notch for the battery pack in the base piece, that way it will stay in one place.

 Then we glued on the compartment onto the base piece.
 We pulled the light thru to the underside of the back and now we were ready to add the 2 side panels.
 We cut out the pieces and glued on the top detail piece.
 We drilled holes so we could pull the EL Lights thru.
 And here is what the top half of the back looks like all lit up!
 For the bottom half of the back, I painted the base piece black and just left the detail pieces the grey color of the foam.  And here is what we have for the back so far!


Thursday, May 9, 2013

Day 6-8: Back pieces and more work on the breastplates

We made the back pieces so this was the first time we could actually try the armor on.  The male armor (which has been MUCH easier to make) looks great!  The female armor however.....  So you can't really tell from this picture, but the waist fits, but the breasts and neck are floating like 5 inches away from my body...

We tried to make it smaller, to cut it at an angle, to just try to bend it with the heat gun back towrads me.  And all of those things distorted it in really funny ways.  Finally we figured the best thing to do was make a new piece that went around the waist, and literally cut the breasts off the first piece and glue it on.  And wow, that worked pretty well actually!

And if you noticed the color is different, you are right.  Wasn't pleased with the earlier spray paint, found a better color at Micheal's Arts & Crafts Store, which has a bigger selection than Home Depot.  So I took this opportunity to repaint.  Man, I miss being able to walk into the Captain's Quarters on the Normandy and change color with the click of a button!
  
We have been experimenting with velcro to fasten the armor shut.  I was worried that it wouldn't be strong enough, well that wasn't the problem, it was too strong.  When taking the armor off, the hook and loop tape sticks to itself so well, it rips the hot glue off before it detaches from itself.  So we are going to try MORE hot glue, hahahaha.  And if that doesn't work, i tried putting it through my sewing machine and just sewing it to the foam.  That doesn't really work for the thick foam, but for the thin craft foam it works great!  So maybe I will also try sewing it to craft foam, and then gluing the craft foam onto the thick foam since the glue sticks to foam much better than the velcro.

We also did work on the male costume.  The heat gun is great for doing small areas, or bending the foam.  But for shaping you just can't beat the broiler in the oven.  We found that the 6" Styrofoam balls we bought for the breasts also work great for shaping the male codpiece.

So here is what we have so far for the male outfit!


Saturday, May 4, 2013

Day 5: Painting the Female Breastplate, continuing the Male Breastplate

Well now it was time to paint that female breastplate we so carefully worked on, eeek!  So I wanted to go for something similar to the coloring my FemShep had in her Mass Effect 3 armor.  Which sadly involves stripes and 3 different colors.


So my foam is already purple, so my first task was to tape off with painters tape any parts that were remaining the original purple.  The curved areas were especially tricky so I just ripped off a whole bunch of little pieces of tape to follow the curve.

For my paint I just used spray paint, first of all, that just sounds a lot faster.  Secondly, I kinda suck at painting, and spray gives it a nice even coverage.  I thought about using acrylic paint and a brush, but if you are not careful, then it can go on too thick and you wouldn't be able to see the cross-hatch texture of the foam.  Also if you are not careful it can be thick and goopy in one spot, but thin in another, and ugh!

I continued to tape so just the part that is dark purple was showing, plus a little bit of the area that will be medium purple.  That way when I paint it medium purple, I can just block off an area with painters tape and I wil get my dark purple stripe.

I did the first layer of paint, let it dry for like an hour and then put tape on top so I could paint on the next color and have the dark purple show through where the stripe is.  Well, sadly when I peeled the tape off it did take some of the first layer with it.  And the stripe is so thin I though, shoot, it is going to be REALLY difficult to spray such a small area.  Hmmm, I wonder if I can just kinda spray some paint into a cup and then use a paintbrush to touch up the line, and the answer is thank god, YES that does work, quite well actually!


I used painters tape to block off the stripe, but I didn't want the stripe to be too fat, so I just took an exacto knife and cut the tape in half while it was still on the roll.  So then I was able to spray on my next layer.


And then the big reveal!  I am pretty pleased overall.  Not the exact shades of purple I wanted, my FemShep has a much brighter color overall, but...oh well.  That is the downside of spray paint, not NEARLY as many color options.


Oh, ALSO, so if your spray paint suddenly stops working, I highly recommend NOT turning it around and pointing it at your face......

I was using it, it stopped working.  I turned around and went back into the garage and then looked at it, and woosh, hahahahah.  Thankfully I was wearing glasses!  I did find that taking the little cap/sprayer thingie off and soaking it in paint thinner works quite well however!


For the bottom edging of the male breastplate, we used two pieces of the craft store craft foam and layered them on top of each other to give it the right texture.  We hot glued them together, and if you try to just make one stripe of hot glue the entire length and set the foam down all at once, the hot glue at the beginning has already started to cool by the time you get there, so you really want to lay them out how you want to go, start gluing in one corner, glue a little together, stop, move down a few inches and glue that together, ect....  So yeah, you will have a much easier time just gluing as you go a few inches at a time, rather than trying to glue one big piece.
Then we used the dremmel to remove away some of the underside of the male breastplate to glue this onto so that it is flush with the back side and glued that on.


We also started working on the back of the armor.  So the back piece and the collar are connected.  The collar has one piece that is smooth and the rest has the cross hatches.  Rather than trying to sand it away or anything, we just cut the smooth piece out of the middle, and then flipped it around and glued it back in!
Then we did some heat gunning to it, we just held it in place with our hands as we did it, then afterwards we just used a zip tie to hold it in place as it cooled.


 We also spent some more time sanding away the cross hatch pattern on the male tummy piece, since this was a much larger area we used our belt sander.

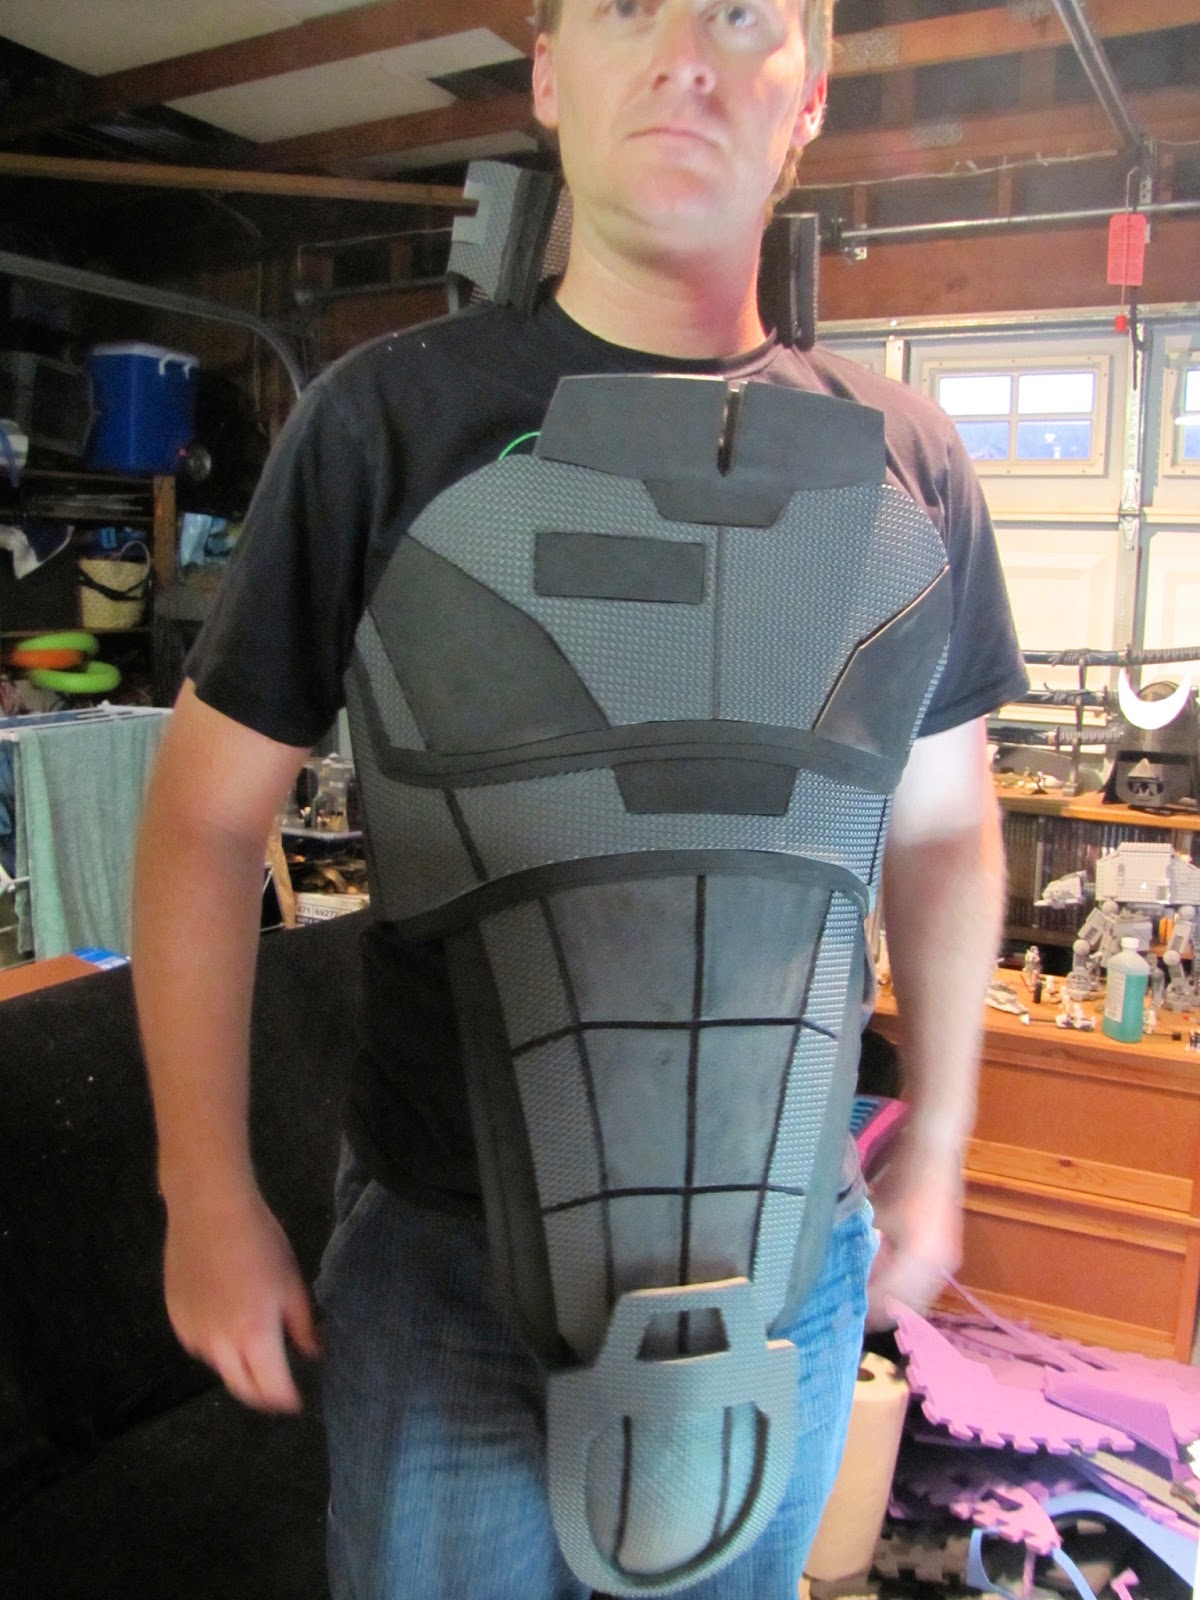
And here is what we have so far!